
ad a butcherblock countertop fab
I had a butcherblock countertop fabricated by a professional woodworker last year, when Ikea had no supply for months. I do think these would work on older cabinets. I just needed an idea of where to the sink would be so that I didnt put screws in or right up next to the sink hole. Cant wait to see this stained! We are a participant in the Amazon Services LLC Associates Program, an affiliate advertising program designed to provide a means for us to earn fees by linking toAmazon.comand affiliated sites. When I researched it the only food safe coating was watco finish and bees wax i think. So sorry for the late reply! They actually had a stamp on them that said stud, so theyre clearly meant for framing, which is why theyre pretty rough. 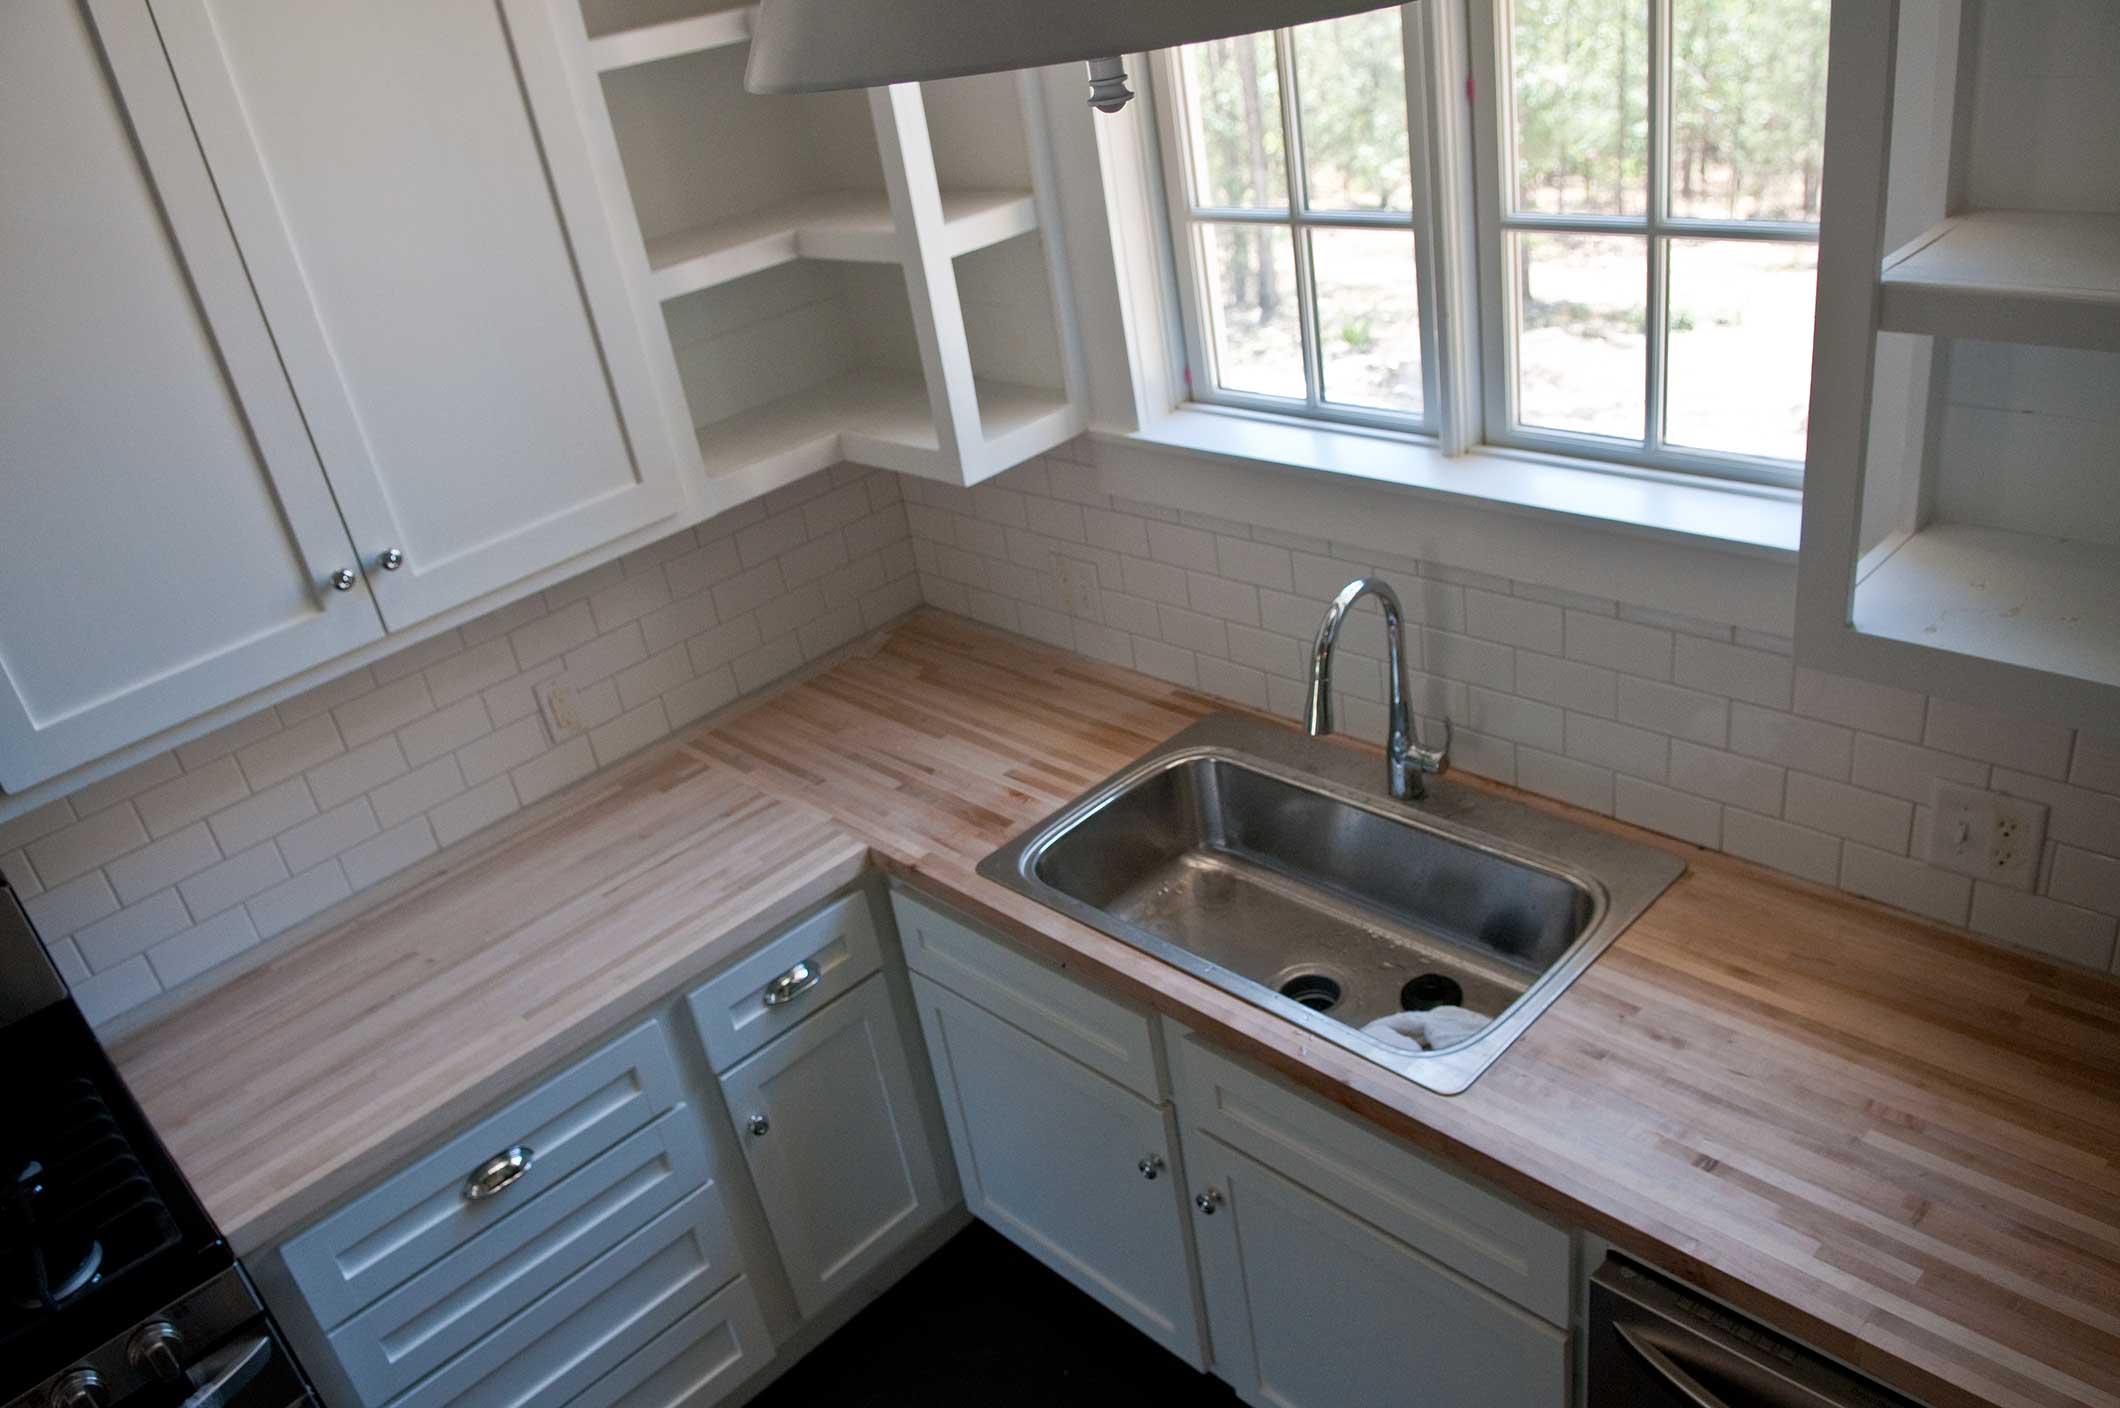 Just order it to size, and then fasten it down. I cant seem to match mine up correctly I know I need some sort of adapter but Im not sure exactly what. Kristi this is amazing. See my brother installed these counters a few years ago in his kitchen and really was the expert. Then I used that to sand off the excess from the corners. Through Press Play, companies have an opportunity to massage customers?? I was advised to use a 2 part lacquer intended for wooden floorprotection but even this would not be heat proof.G. Brilliant as usual! I had to dig through the available studs to find ones that looked decent and werent warped. 3 years later, how do these counter tops look now? This was 30 years ago, and finishes have improved since then, Im sure. So today is the big day it is install day! Many manufacturers will measure and install a butcher block for you, but you can save on labor by making your own template out of a semirigid material, such as cardboard, and sending it to the factory. If I can start the cut on the edge, Im fine with a circular saw. Allow the oil to soak into the wood for a few minutes, then wipe off the excess. Share it with us! Shown: Walnut Edge Grain from The Grothouse Lumber Company, about $90 per square foot; glumber.com. Now normally you see me installing or DIYing a lot of these projects but today is all about my brother and my dad, I was really just along to assist and learn. The variations in the color make eachcountertop unique and give it a distinctive natural look. I havent done anything over there since December. Tube of Clear Silicone They work perfectly for making a template, if you have a corner that you need to cut at a 45 degree angle. I refinished the countertoep last month, not because the finish was damaged (it was actually in perfect condition), but because it was darker than I wanted it for the more colorful makeover I did last month. Double-check that the countertop overhang stays consistent between the edge of this piece and the cabinet fronts as you tape it down.
  With proper installation, butcher block lasts many years.
 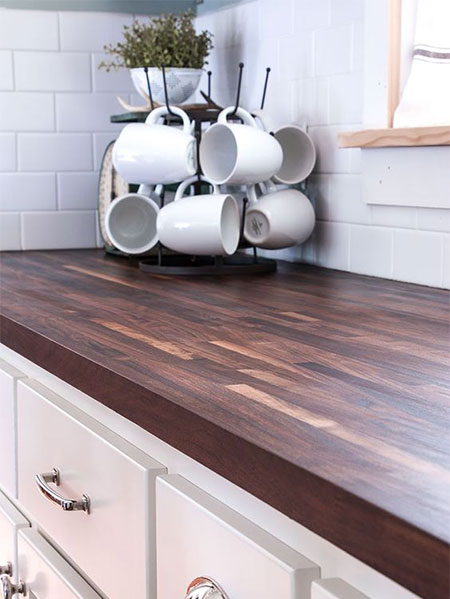 I dont have a special adapter. It didnt look any better than yours, and I would hate to tell you what it cost! I use Elmers from Home Depot the kind that comes in those little tub containers. Youve done such a beautiful job! But again, you can just google how to use a Kreg jig and youll find a tutorial on just about every DIY blog out there. Using frogtape mark where to cut. It often has knots or heartwood in cream or light brown which will give your countertop a unique and distinct natural look. As for the stain, I chose walnut for this project.
  I wanted a slightly lighter finish. We'd been wanting to add a backsplash so I added the tile backsplash before finishing with caulking the seams. But because of the way part of it will wrap around and act as a backsplash for the vanity, the wainscoting has to be installed before I can install the vanity. At that point, it was really starting to look nice! Support.
I have to hold the shop vac hose onto the sander a I use it. This will extend their lifetime and protect them from stains and water damage. I also sanded each coat before applying the next with a piece of super fine steel wool. Not very pretty. If I made a countertop out of those with the rounded edges, Id be sanding for days (or using an obscene amount of wood filler) in order to get a flat surface. So I was left with corners that needed quite a bit of sanding and finishing in order to make them look nice. I am in the process of making on like you did and want to know your preference for wood fillers. Make sure before installing your counters you take the time to properly seal and finish them. Your finish looks excellent but I would be interested to hear how the finish is holding up to every daykitchen use. This will help guide the saw and keep the cut straight. Using a handsaw, cut strips of -inch plywood to fit 2 inches shorter than the depth of the cabinets. Thanks, you are wonderful and so motivating, you have changed my life and I am forever grateful. 2 1/2 Blue Kote Kreg Screws. Kreg Pocket Hole Jig Cant wait for your next postLove the progress you are making and the ideas you are presentingWish I lived closerI would come sand for you..or maybe bring you and Matt lunchHow is the sale of the condo coming along? Tape more strips of cardboard along any seams between cabinets to show where they fall. Were you afraid they would bow or flex too much since they couldnt be fastened together as close? After I install the wainscoting, Ill come back and finish up the vanity and countertop. Im much better with a jigsaw. Hi Kristi, What brand wood filler do you use?
If you're working with open-topped cabinets, you'll need to install blocking so there's something to screw the butcher block to. In order to fit under that sink we had to account for some cut outs. Adding crown molding to your kitchen cabinets. Advice. I used it to create countertops for my skoolie!! A hand held belt sander would have also worked very well to smooth out the to top of the countertop. Our expertise is founded upon the core principles of learning, however, our promise to deliver is founded squarely upon our achievements. Great description, thank you. Im sure it will stain up and become a Bathroom with the WOW factor. I did give instructions for the new finish. I do this when crosscutting oak plywood and preapplied formica counter tops as well. I'd love to see the finished counters when you are done! Seems this would have been the perfect excuse to buy a router! Im not going to go over the details of how to use a Kreg Jig since there are approximately 12,000 tutorials on YouTube alone. Then I was finally ready for wood filler. And with a solid scientific background influencing our approach, these skills, together with our ability to work with and through people, translate into a broad range of capabilities within a wide array of applications. In hours you can turn a chilly steel-and-stone room into a charming cook's corner. Tom Silva shows how to install baseboard trim that become visual anchors for any room. Another custom-made, awesome project by the master DIYer! Our team is highly motivated, fast-learning, task and detail-oriented with a proven ability to identify, analyze, and solve problems. I think if anybody can do it , you can :0).
Here is the best tip I am going to give you. Your work is amazing. I wonder if any of the finishes are safe for a hot pan? Now instead of just using a tape measurer we put the counters in place to mark our cuts. I hope youll join me on my DIY and decorating journey! Our robust yet cost-effective offerings are both tactile and experiential and support a myriad of corporate objectives. It didnt need to be perfect since I would be doing lots of sanding, but I didnt want to end up with any really significant height differences from board to board because that would just require even more sanding. That 60-grit sandpaper cut right through all of the rough areas and wood glue, and leveled out the boards quite nicely. But they had hard water, and any water left to evaporate on the counter left a white mark. This came out great! If youre having problems with it taking the stain, then the problem is probably the stain that youre using rather than the wood filler.
Great ideas. I chose not to use my belt sander simply because its a very powerful tool, and it takes a lot of strength to keep it under control. Using a drill/driver fitted with a -inch bit, drill angled pilot holes, about -inch away from the edges, that go through the top of the blocking and out the cut ends. Thanks so much! Boards screwed and glued lke that can split, especially soft woods like pine. And as I was attaching the boards, I used my 24-inch clamp to keep them together while screwing them together. But so far, this is what it looks like. Oil the block once a month. But most of us DIYers dont have fancy planers (especially not the size needed for this type of project), so I I had to rely on my sander to do the job instead. I'm super happy with how the finish has held up after a year. OMG!!!!
I don't believe Waterlox is food safe, but I'm not positive. Walnut gets lighter in color with age. The products included in this article are available at various home improvement stores, local home centers, and online retailers like Amazon. Birch is fine-grained and pale in color with a satin-like sheen that darkens with age. Ill definitely use an oil-based product. Absolutely! Fit the blocking in place at the front of the cabinet. Thank you! I also sanded all of the edges by hand to give them that slightly rounded look that I like. Our collective professional experience demonstrates skills that are broadly transferable. I started out with 2 x 3 pine boards. We did this 4x years ago but left the original finish and just oil ours with mineral spirits. 1 1/4 Course Thread Kreg Screws Thank you for this great tutorial! Again using frogtape we marked the indent that needed to be cut out and followed along those lines cutting with the jigsaw. These butcher block counters that I did are in a high use area, next to the stove and fridge, and they've held up so well. They drilled the corners, and used the resulting hole to start the jigsaw. By the way 23 studs are typically used in spaces where structural support isnt required, like framing out a basement, and where space is limited. Wow! Thanks so much! Excited..cant wait! Quick question, what circular saw guide did you use to cut the block? See? Run the tip of the compass along the wall, with the pencil on the cardboard, to transfer the contours of the wall to the strip. From inside the cabinet, drive a deck screw fitted with a fender washer up through each hole, into the butcher block. At Press Play we deliver intelligent solutions that simplify the process for businesses to stay in step with the dynamically changing technology landscape. Do you have a tutorial for your finishing process? Not sure I can stand this.
Create another long piece with a perfectly straight edge to act as the front of the template. And then I would repeat that process to add the next board, and then the next, and the next, until all of the boards were attached together. That looks frickin amazing!!! did you replace the area around your sink? So Im interested in how shell situate it in the end too, but Ive been following her blog so long, thinking of this stuff is second nature to her and shes not above sacrificing a bit of function for form at times either if it comes to that.. Lol . I do leave electrical and plumbing to the pros but everything else is MINE! How to Make a DIY Butcher Block Countertop. Measure the depth of the cabinets. Tip: For larger countertops with sinks or ranges, tape down strips to outline where the rough openings for the necessary cutouts should go. This counter-top is made from construction lumber, or pine, which is considered soft wood. The problem with the boards is that theyre rounded on the edges. Wood Clamps For us working in the kitchen seemed to be the best option with weather. I measured about four or five times to be sure I the placement just right, and used the template that came with my sink to mark the cut line. Also note on the template which edges should be shaped in a profile and which will be straight cuts. document.getElementById( "ak_js_1" ).setAttribute( "value", ( new Date() ).getTime() ); This site uses Akismet to reduce spam. I made new countertops for my kitchen using a butcher block slab I bought from Ikea. I bow to you, Oh Queen of DYI. Create one hole like this on each cabinet. Learn how your comment data is processed. I dont know anything about carpentry but I can appreciate all the work you put into what youre doing. Get the latest This Old House news, trusted tips, tricks, and DIY Smarts projects from our expertsstraight to your inbox. I just snapped this picture because the sunlight w, There have been a couple of changes in here. Now its the first thing I check everyday. That way youll never miss a thing! It worked out great! To secure them, Ikea conveniently provided some angle bracket hardware and screws. But for people who are stronger than I am, or have stronger hands, and have experience with a belt sander, it would be much faster than a a rotary sander at smooth out the top. About: I am a self taught maker that has fallen in love with making instead of buying. You are my DIY hero! I know. If you have beginner to intermediate building/woodworking skills, and have some basic tools, you should be able to build your own butcher block countertops. I used General Finishes High Performance Topcoat in a matte finish. What a great economical way to create a countertop. Make sure you keep the cardboard the countertops came in. So before we get started lets make sure you read up on how I finished these countertops with spar varnish to protect it from water, warping and stains. It is fun to watch you do your thing. Reviews on most brands i look into say they dont take the stain despite the box clearly stating stainable. Once you have made your pocket holes run clear silicone on the inner edge of your counters. Before moving to the finishing stages, I used my circular saw to cut the countertop for the vanity to the exact length that I needed.
Tape it in place between the two sides. I would like to replace some soon too but nor sure how to finish if at all, Reply So I am sure to find a place for that! This entire bathroom project is one of those one thing leads to another and one project is dependent upon another types of things. We are the same age.
Goodness your home will feel like your baby by the time you are finished! If your cabinets have solid tops, it's best to glue down furring strips in order to create an air space beneath the countertop and prevent it from cupping in situations where humidity swings are an issue. I started this step by applying two coats of Waterlox Original, with 24 hours of drying in between. Now if your counters are in good shape and you just want to update,see if you have a local Habitat for Humanity Restore in the area. FYI, the studs that you used are furring studs used for non structural walls, such as covering brick face. Push the strip back tight against the wall, using the combination square to verify the overhang depth. A solar generator gives you backup energy from the sun should your electricity fail. I cant wait to see the next chapter in your DIY adventures! Once I determined the order in which I wanted the boards, I flipped the boards over because I would be working on the bottom side of the countertop to put it together.
We used the 1 1/4 course thread kreg screws I screwed one on each of the pairs alternating sides then came back and did the second screw. You can also find me on Instagram @makergray. Installing a butcher block starts with ordering one to fit your space. Its turning out great, cant wait to see the bath completed, but love seeing every step along the way even more. I love it when that happens!). Answers. Dont plan to slow down until I absolutely must! Kristi rocks! Which led to moving the cabinets over and being short with the existing countertop. The last step to completing the countertops was to caulk the edges. Fairly easy, but does require precise measuring. Once done wipe any excess silicone on each side. You can click here to see the finished room. Here are the first three boards put together. It was beautiful and unusual.
As I understood what Kristi wrote, she is now taking the whole vanity & counter out, now that she knows the height after building the vanity & butcher block for that reason (to establish height), to put in wainscoting that will also act as backsplash. So now Im undecided. Such an improvement! You give so much hope to those of us on a budget! Be sure to include any overhang you want the butcher block to haveas little as 1 inches for a standard countertop or up to a foot for a seating counterand keep it consistent and parallel to the front of the cabinets as you scribe. Drilling two pocket holes on each side of the cut about 8-12 inches apart. I got it put together, did a preliminary sanding with 60-grit sandpaper, cut out the sink hole, got all of the cracks filled with wood filler, and then sanded it down to a smooth finish with 150-grit sandpaper. Those came out great! Unfortunately mine were not in good enough shape there was a lot of warping and water damage. You can see it here: https://www.addicted2decorating.com/how-to-refinish-pine-wood-countertops.html. Last Updated on March 26, 2022 by Kristi Linauer. The boards were slightly unlevel with each other, and I had wood glue seeping out in areas. Addicted 2 Decorating is a participant in the Amazon Services LLC Associates Program, an affiliate advertising program designed to provide a means for sites to earn advertising fees by advertising and linking to Amazon.com. And since we use the whole tree even the crooked branches and the small twigs we can save natural resources too. Excellent idea. Finished Ikea Hammarp Butcher Block Counters If youre not used to using a belt sander, it can easily get out of control and cause damage. I started the project by measuring for my cuts. Using a drill/driver fitted with a -inch paddle bit, drill through the center of the blocking or through the solid cabinet top at one furring strip. No water damage at all. I wanted to make a butcher block table, and I was intrigued with your process of using pocket screws instead of bar clamps. Making the DIY installation less daunting. Should be awesome! They are pine, and they started out pretty rough. We just don't put food directly on them. video for S20 E37: Deck Chairs, Damp Basement. Now if you decide to do all your cuts in the kitchen have your shop vac ready. This helps to even out the color and create a much more even stain coat. I wanted the countertops to have more of a matte finish, so I used a mixture of 50/50 Waterlox Original and Waterlox Satin Finish for the last two coats of sealing - for a total of 4 coats. Frog Tape Make sure to set the pocket hole drill bit for the size screw you are using. Next, I used my Kreg pocket hole jig (this is the updated version of the set I have) to drill the pocket holes, and attach the boards to each other one by one. I've since learned this. Thankfully no tear out on this counter but I wish I'd known that earlier. They can be sanded down to remove minorscratches, andwill keep their natural beauty over the years. and is unable to do physical work, so I do the majority of the work on the house by myself. Dont think I will be needing a dining table that seats 22 people once we retire, and the table when the gate legs are closed is only 34 inches wide. Will you use some kind of wood conditioner to insure the stain will soak in evenly? We decided to use a kreg jig to create pocket holes on the underside of the countertops. Cozy things up with rich-looking butcher block. Would you mind sharing the kind & brand of wood filler you use? Thanks so much. If youre satisfied with a less expensive wood like pine, and the countertop will be used in an area like a utility room or bathroom, and you already have all of the necessary tools, it will probably save you money to build your own. Adjust a combination square to the depth of the counter overhang. For this bathroom project, Im building a 1/5-inch thick, durable butcher block countertop that could accommodate an undermount sink. I love when your posts show up in my email, you always impress and inspire me! So we stained and sealed them in the end. My marks at this point didnt have to be precise, as this sink outline wouldnt actually be the cut line I use to cut the sink hole. Basic takeaway, butcher block cost more because the materials, and subsequently the performance, are superior. With knowledge and practice across the varied spectrum of commerce, our entrepreneurial spirit, aptitude coupled with a deep commitment to results are what sets us apart. I pre-drilled the holes and then screwed one side to the cabinet base and then one side to the countertop. Check out the video here (or above) for a more detailed tutorial, Tools and materials I used to make this project (affiliate).
- Cotton Maxi Dress With Short Sleeves
- Designer Exchange Syosset
- Hp Laserjet Mfp M227-m231 Scan To Pdf
- Outdoormaster Golf Travel Bag
- Always Incontinence Pads
- The Marker San Francisco Parking
ad a butcherblock countertop fab 関連記事
- 30 inch range hood insert ductless

-
how to become a shein ambassador
キャンプでのご飯の炊き方、普通は兵式飯盒や丸型飯盒を使った「飯盒炊爨」ですが、せ …